Thankfully, the art of baking is alive and well in Scandinavia, where coffee breaks are a cherished part of the day. I’m especially fond of the sweetened yeast breads made throughout Finland, Sweden, Denmark and Norway, in all sorts of intricate shapes.
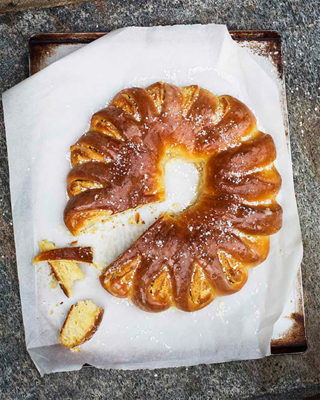
The truth is, anything with almond paste makes me swoon, and this beautiful wreath is a particular favorite. During our penurious year in Stockholm we had two weekly indulgences: a visit to Tommy, our friend the fishmonger, and a pastry at Vete-Katten, a warren of small rooms where coffee was served in Royal Copenhagen china and most of the patrons (it seemed to us) were ladies of a certain age, all perfectly dressed and coiffed.
This Konditori is now less formal, and the plates more pedestrian, but the pastries and breads remain spectacular. It’s hard to decide which I like best: kanelbullar (soft cinnamon buns); semlor (tender cardamom buns filled with marzipan and whipped cream); the lavish prinsesstårta (sponge cake layered with pastry cream, raspberry jam, and whipped cream mounded into a dome and draped with pale green marzipan); or this delightful almond wreath.
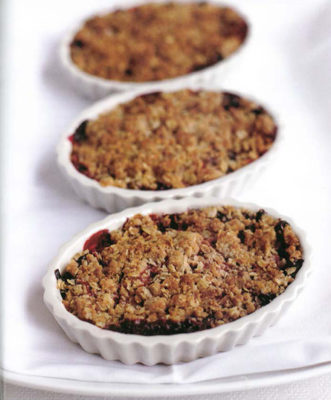
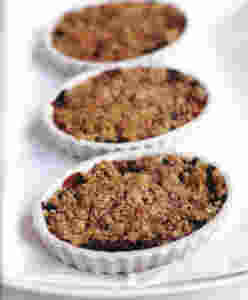
Like all sweet breads, mandelkrans tastes best when very fresh, but you can reheat it gently to serve the next day.
Recipe from: Fire + Ice: Classic Nordic Cooking
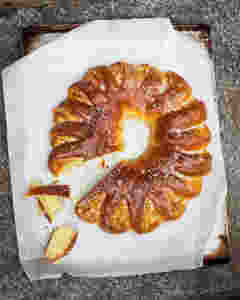
Swedish Almond Wreath (Mandelkrans)
Ingredients
Wreath
- 1 package active dry yeast (2¼ teaspoons)
- ¼ cup lukewarm water
- 4 tablespoons granulated sugar, divided
- ¾ cup whole milk, lukewarm
- 1 egg, at room temperature
- 6 tablespoons unsalted butter, softened and separated into lumps
- ¼ teaspoon salt
- 3 to 3½ cups all-purpose flour
Filling
- ½ cup blanched almonds
- 3 tablespoons granulated sugar
- 3 tablespoons unsalted butter, softened
- ⅛ teaspoon natural almond extract
Glaze
- 1 cup confectioner’s sugar
- 2 tablespoons freshly squeezed orange juice
- Pearl sugar
Instructions
- In a large bowl proof the yeast and 1 Tablespoon of the sugar in the lukewarm water for 5 minutes, until bubbles appear. Stir in the remaining 3 Tablespoons sugar, the lukewarm milk, egg, butter and salt. Add the flour, mixing well to make a soft dough.
- Turn the dough out onto a floured surface and knead until it springs back to the touch, 8 to 10 minutes, adding up to ½ cup more flour if necessary. Or knead with the dough hook of a mixer at slow speed for 5 minutes.
- Shape the dough into a ball and transfer it to a clean, lightly greased bowl, turning it to grease the top. Leave it to rise, covered, in a warm place until doubled in bulk, about 1½ hours. Punch the dough down and turn it out onto a lightly floured surface. Let sit while you prepare the filling.
- In a food processor grind together the almonds and the sugar until the nuts are very finely ground. Transfer to a bowl and mix in the softened butter to form a mass. Stir in the almond extract.
- Roll the dough out to a 12 x 18” rectangle. With a small spatula spread the almond paste evenly over the entire rectangle. Starting at the long end, roll the dough up jellyroll fashion into a log. Transfer it to a parchment-lined baking sheet and set it seam-side down. Bring the ends together to form a ring, sealing them tightly.
- With scissors, snip the dough ⅔ of the way through to the center of the ring at 1-inch intervals. Gently turn each cut section on its side. Leave the loaf to rise, uncovered, until almost doubled, about 45 minutes.
- Preheat the oven to 375°F. Bake the bread for 20 to 25 minutes, until golden. While it is baking, prepare the glaze by mixing together the confectioner’s sugar and orange juice.
- While the loaf is still warm spoon the glaze over the loaf. Sprinkle with pearl sugar. Transfer carefully to a rack to cool.